|
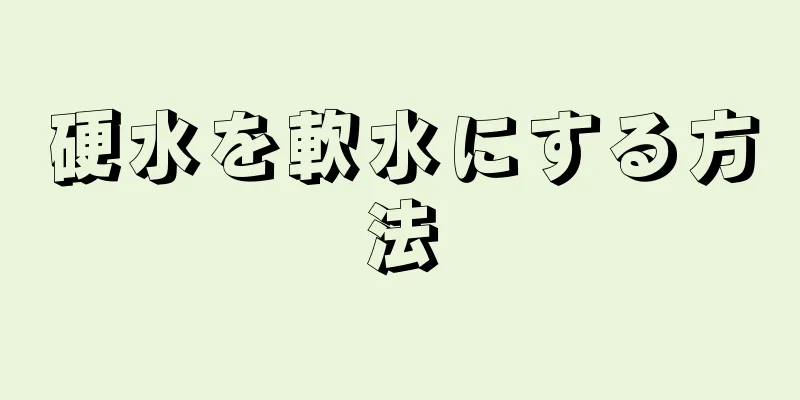
素晴らしい絵画を作成するために、Photoshop のような複雑なソフトウェアを使用する必要はありません。Microsoft に組み込まれているペイント プログラムを使用して、優れた作品を完成させることができます。この記事では、ペイントの古いバージョンと新しいバージョンの使い方と、いくつかのヒントを紹介します。まずは最初から学んでみましょう! ステップ方法1方法1/3:クラシックバージョン- {"smallUrl":"https:\/\/www.wikihow.com\/images_en\/thumb\/0\/0c\/Draw-and-Color-with-Microsoft-Paint-Step-1-Version-5.jpg\/v4-460px-Draw-and-Color-with-Microsoft-Paint-Step-1-Version-5.jpg","bigUrl":"https:\/\/www.wikihow.com\/images\/thumb\/0\/0c\/Draw-and-Color-with-Microsoft-Paint-Step-1-Version-5.jpg\/v4-728px-Draw-and-Color-with-Microsoft-Paint-Step-1-Version-5.jpg","smallWidth":460,"smallHeight":345,"bigWidth":728,"bigHeight":546,"licensing":" class=\"mw-parser-output\"><\/div>"} 1鉛筆ツールを使用してスケッチを描きます。色鉛筆を使用すると、黒の鉛筆よりも効果が向上します。
- {"smallUrl":"https:\/\/www.wikihow.com\/images_en\/thumb\/8\/88\/Draw-and-Color-with-Microsoft-Paint-Step-2-Version-5.jpg\/v4-460px-Draw-and-Color-with-Microsoft-Paint-Step-2-Version-5.jpg","bigUrl":"https:\/\/www.wikihow.com\/images\/thumb\/8\/88\/Draw-and-Color-with-Microsoft-Paint-Step-2-Version-5.jpg\/v4-728px-Draw-and-Color-with-Microsoft-Paint-Step-2-Version-5.jpg","smallWidth":460,"smallHeight":345,"bigWidth":728,"bigHeight":546,"licensing":" class=\"mw-parser-output\"><\/div>"} 2主線を描きます。鉛筆ツールを使用して、図面の主な線をスケッチ風に描いたり、太い線で描いて絵をきれいに見せたりします。
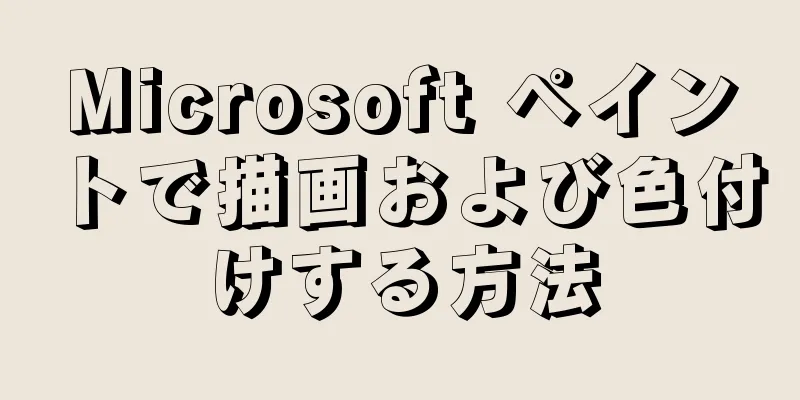
- {"smallUrl":"https:\/\/www.wikihow.com\/images_en\/thumb\/9\/95\/Draw-and-Color-with-Microsoft-Paint-Step-3-Version-5.jpg\/v4-460px-Draw-and-Color-with-Microsoft-Paint-Step-3-Version-5.jpg","bigUrl":"https:\/\/www.wikihow.com\/images\/thumb\/9\/95\/Draw-and-Color-with-Microsoft-Paint-Step-3-Version-5.jpg\/v4-728px-Draw-and-Color-with-Microsoft-Paint-Step-3-Version-5.jpg","smallWidth":460,"smallHeight":345,"bigWidth":728,"bigHeight":546,"licensing":" class=\"mw-parser-output\"><\/div>"} 3基本色を塗りつぶします。塗りつぶしツールを使用して描画に色を付けます。細部に色を付けるには、画像を拡大する必要がある場合があります。
- 塗りつぶしツールには、傾いたペイントバケツに似たアイコンがあります。
- {"smallUrl":"https:\/\/www.wikihow.com\/images_en\/thumb\/6\/64\/Draw-and-Color-with-Microsoft-Paint-Step-4-Version-5.jpg\/v4-460px-Draw-and-Color-with-Microsoft-Paint-Step-4-Version-5.jpg","bigUrl":"https:\/\/www.wikihow.com\/images\/thumb\/6\/64\/Draw-and-Color-with-Microsoft-Paint-Step-4-Version-5.jpg\/v4-728px-Draw-and-Color-with-Microsoft-Paint-Step-4-Version-5.jpg","smallWidth":460,"smallHeight":345,"bigWidth":728,"bigHeight":546,"licensing":" class=\"mw-parser-output\"><\/div>"} 4影を描きます。鉛筆ツールを使って影部分の境界線を描きます。少し端を隠しても大丈夫ですし、後で修正するのも簡単です。境界線を描くのに使用する色は、影に使用する色と同じにする必要があります。
- {"smallUrl":"https:\/\/www.wikihow.com\/images_en\/thumb\/a\/ac\/Draw-and-Color-with-Microsoft-Paint-Step-5-Version-5.jpg\/v4-460px-Draw-and-Color-with-Microsoft-Paint-Step-5-Version-5.jpg","bigUrl":"https:\/\/www.wikihow.com\/images\/thumb\/a\/ac\/Draw-and-Color-with-Microsoft-Paint-Step-5-Version-5.jpg\/v4-728px-Draw-and-Color-with-Microsoft-Paint-Step-5-Version-5.jpg","smallWidth":460,"smallHeight":345,"bigWidth":728,"bigHeight":546,"licensing":" class=\"mw-parser-output\"><\/div>"} 5影を追加します。塗りつぶしツールを使用して、使用した基本色よりも暗い色で影の領域を塗りつぶします。
- {"smallUrl":"https:\/\/www.wikihow.com\/images_en\/thumb\/e\/e7\/Draw-and-Color-with-Microsoft-Paint-Step-6-Version-4.jpg\/v4-460px-Draw-and-Color-with-Microsoft-Paint-Step-6-Version-4.jpg","bigUrl":"https:\/\/www.wikihow.com\/images\/thumb\/e\/e7\/Draw-and-Color-with-Microsoft-Paint-Step-6-Version-4.jpg\/v4-728px-Draw-and-Color-with-Microsoft-Paint-Step-6-Version-4.jpg","smallWidth":460,"smallHeight":345,"bigWidth":728,"bigHeight":546,"licensing":" class=\"mw-parser-output\"><\/div>"} 6リフレクションを追加します。塗りつぶし領域を使用して、明るい色で反射領域を塗りつぶします。
- {"smallUrl":"https:\/\/www.wikihow.com\/images_en\/thumb\/8\/8c\/Draw-and-Color-with-Microsoft-Paint-Step-7-Version-4.jpg\/v4-460px-Draw-and-Color-with-Microsoft-Paint-Step-7-Version-4.jpg","bigUrl":"https:\/\/www.wikihow.com\/images\/thumb\/8\/8c\/Draw-and-Color-with-Microsoft-Paint-Step-7-Version-4.jpg\/v4-728px-Draw-and-Color-with-Microsoft-Paint-Step-7-Version-4.jpg","smallWidth":460,"smallHeight":345,"bigWidth":728,"bigHeight":546,"licensing":" class=\"mw-parser-output\"><\/div>"} 7が完了しました。描画にさらに詳細を追加することもできますが、これらは基本的な手順であり、練習が必要です。 広告する
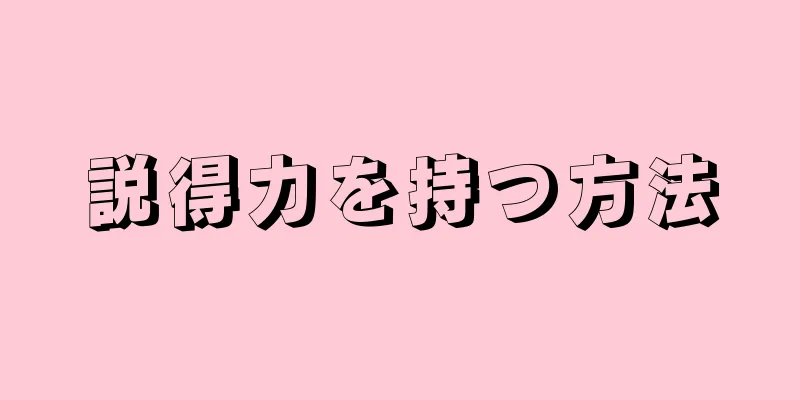
方法2方法2/3:最新バージョン- {"smallUrl":"https:\/\/www.wikihow.com\/images_en\/thumb\/3\/3c\/Draw-and-Color-with-Microsoft-Paint-Step-8-Version-5.jpg\/v4-460px-Draw-and-Color-with-Microsoft-Paint-Step-8-Version-5.jpg","bigUrl":"https:\/\/www.wikihow.com\/images\/thumb\/3\/3c\/Draw-and-Color-with-Microsoft-Paint-Step-8-Version-5.jpg\/v4-728px-Draw-and-Color-with-Microsoft-Paint-Step-8-Version-5.jpg","smallWidth":460,"smallHeight":345,"bigWidth":728,"bigHeight":546,"licensing":" class=\"mw-parser-output\"><\/div>"} 1ファイルサイズを調整します。描画ソフトウェアにはデフォルトで基本的なピクセルしかないため、より良い作品を描きたい場合はキャンバスのピクセルを増やす必要があります。 [調整] ボタンをクリックし、ピクセルを 2000 以上に調整します。
- {"smallUrl":"https:\/\/www.wikihow.com\/images_en\/thumb\/f\/fa\/Draw-and-Color-with-Microsoft-Paint-Step-9-Version-5.jpg\/v4-460px-Draw-and-Color-with-Microsoft-Paint-Step-9-Version-5.jpg","bigUrl":"https:\/\/www.wikihow.com\/images\/thumb\/f\/fa\/Draw-and-Color-with-Microsoft-Paint-Step-9-Version-5.jpg\/v4-728px-Draw-and-Color-with-Microsoft-Paint-Step-9-Version-5.jpg","smallWidth":460,"smallHeight":345,"bigWidth":728,"bigHeight":546,"licensing":" class=\"mw-parser-output\"><\/div>"} 2スケッチを描いてコンピューターにアップロードします。リアルなスタイルで描きたい場合は、最初に描いてからコンピューターにスキャンするか、写真をコンピューターに転送する方が速くなります。描画ソフトで直接描画することもできますが、薄いグレーを使用するのが最適です。
- 図面をスキャンした場合は、描画ソフトウェアでファイルを開いて描画を開始するだけです。ただし、最初に元の図面をバックアップする必要があります (間違いがあって再描画する必要がある場合に備えて)。
- {"smallUrl":"https:\/\/www.wikihow.com\/images_en\/thumb\/3\/32\/Draw-and-Color-with-Microsoft-Paint-Step-10-Version-5.jpg\/v4-460px-Draw-and-Color-with-Microsoft-Paint-Step-10-Version-5.jpg","bigUrl":"https:\/\/www.wikihow.com\/images\/thumb\/3\/32\/Draw-and-Color-with-Microsoft-Paint-Step-10-Version-5.jpg\/v4-728px-Draw-and-Color-with-Microsoft-Paint-Step-10-Version-5.jpg","smallWidth":460,"smallHeight":345,"bigWidth":728,"bigHeight":546,"licensing":" class=\"mw-parser-output\"><\/div>"} 3主線を描きます。曲線ツールを使用して、本体のメインラインの輪郭を黒で描きます。連続した線(上まぶたなど)を見つけて、その線の一方の端をクリックし、次にもう一方の端をクリックします。マウスを使用して、描画した線を押したまま、選択した線と一致するようにドラッグします。描画上のすべての線が黒くなるまで、このプロセスを繰り返します。
- 黒い線は重要です。線の色は後で変更できますが、今は黒色のままにしておきます。
- {"smallUrl":"https:\/\/www.wikihow.com\/images_en\/thumb\/3\/36\/Draw-and-Color-with-Microsoft-Paint-Step-11-Version-4.jpg\/v4-460px-Draw-and-Color-with-Microsoft-Paint-Step-11-Version-4.jpg","bigUrl":"https:\/\/www.wikihow.com\/images\/thumb\/3\/36\/Draw-and-Color-with-Microsoft-Paint-Step-11-Version-4.jpg\/v4-728px-Draw-and-Color-with-Microsoft-Paint-Step-11-Version-4.jpg","smallWidth":460,"smallHeight":345,"bigWidth":728,"bigHeight":546,"licensing":" class=\"mw-parser-output\"><\/div>"} 4余分な行をクリアします。今度はスケッチを消去します。クリックして選択し、画面を右クリックして「色の反転」を選択します。次に、「ファイル」→「パラメータ」をクリックし、「OK」をクリックして画面の色を白黒に変更します。同じ方法で色を元に戻し、画像を再び白黒に戻すと、画像がきれいになります。
- 特に間違えてやり直す必要がある場合には、黒線描画をバックアップする必要があります。
- {"smallUrl":"https:\/\/www.wikihow.com\/images_en\/thumb\/6\/64\/Draw-and-Color-with-Microsoft-Paint-Step-12-Version-4.jpg\/v4-460px-Draw-and-Color-with-Microsoft-Paint-Step-12-Version-4.jpg","bigUrl":"https:\/\/www.wikihow.com\/images\/thumb\/6\/64\/Draw-and-Color-with-Microsoft-Paint-Step-12-Version-4.jpg\/v4-728px-Draw-and-Color-with-Microsoft-Paint-Step-12-Version-4.jpg","smallWidth":460,"smallHeight":345,"bigWidth":728,"bigHeight":546,"licensing":" class=\"mw-parser-output\"><\/div>"} 5基本色で塗りつぶします。塗りつぶしツールを使用して色を塗りつぶします。色を塗るときは、線の間や角の細かい部分にも色がつくように注意してください。
- {"smallUrl":"https:\/\/www.wikihow.com\/images_en\/thumb\/4\/40\/Draw-and-Color-with-Microsoft-Paint-Step-13-Version-4.jpg\/v4-460px-Draw-and-Color-with-Microsoft-Paint-Step-13-Version-4.jpg","bigUrl":"https:\/\/www.wikihow.com\/images\/thumb\/4\/40\/Draw-and-Color-with-Microsoft-Paint-Step-13-Version-4.jpg\/v4-728px-Draw-and-Color-with-Microsoft-Paint-Step-13-Version-4.jpg","smallWidth":460,"smallHeight":345,"bigWidth":728,"bigHeight":546,"licensing":" class=\"mw-parser-output\"><\/div>"} 6反射、影、中間色を追加します。次の部分は楽しい部分です。すべてを選択して描画を複製し、影を追加する領域 (髪の毛など) を選択し、基本色を選択して色 2 に設定し、影の色を色 1 に設定します。線を押さえる必要はなく、好きなように影を描いてください。一度に 1 つの領域ずつ(同じ基本色で)影をペイントします。
- {"smallUrl":"https:\/\/www.wikihow.com\/images_en\/thumb\/5\/54\/Draw-and-Color-with-Microsoft-Paint-Step-14-Version-4.jpg\/v4-460px-Draw-and-Color-with-Microsoft-Paint-Step-14-Version-4.jpg","bigUrl":"https:\/\/www.wikihow.com\/images\/thumb\/5\/54\/Draw-and-Color-with-Microsoft-Paint-Step-14-Version-4.jpg\/v4-728px-Draw-and-Color-with-Microsoft-Paint-Step-14-Version-4.jpg","smallWidth":460,"smallHeight":345,"bigWidth":728,"bigHeight":546,"licensing":" class=\"mw-parser-output\"><\/div>"} 7レイヤーを作成します。次に、線の外側の色を削除します。画像全体が表示されるまでズームアウトし、「選択」をクリックし、画像を右クリックして、前にコピーした画像を下部に貼り付けます。下矢印をクリックして「透明」を選択すると、魔法のような効果が現れます。
- {"smallUrl":"https:\/\/www.wikihow.com\/images_en\/thumb\/9\/91\/Draw-and-Color-with-Microsoft-Paint-Step-15-Version-4.jpg\/v4-460px-Draw-and-Color-with-Microsoft-Paint-Step-15-Version-4.jpg","bigUrl":"https:\/\/www.wikihow.com\/images\/thumb\/9\/91\/Draw-and-Color-with-Microsoft-Paint-Step-15-Version-4.jpg\/v4-728px-Draw-and-Color-with-Microsoft-Paint-Step-15-Version-4.jpg","smallWidth":460,"smallHeight":345,"bigWidth":728,"bigHeight":546,"licensing":" class=\"mw-parser-output\"><\/div>"} 8引き続き描画を完成させます。すべての領域とすべての影に満足するまで、このプロセスを繰り返します。 広告する
方法3方法3/3:他に何ができるでしょうか?- {"smallUrl":"https:\/\/www.wikihow.com\/images_en\/thumb\/2\/2f\/Draw-and-Color-with-Microsoft-Paint-Step-16-Version-4.jpg\/v4-460px-Draw-and-Color-with-Microsoft-Paint-Step-16-Version-4.jpg","bigUrl":"https:\/\/www.wikihow.com\/images\/thumb\/2\/2f\/Draw-and-Color-with-Microsoft-Paint-Step-16-Version-4.jpg\/v4-728px-Draw-and-Color-with-Microsoft-Paint-Step-16-Version-4.jpg","smallWidth":460,"smallHeight":345,"bigWidth":728,"bigHeight":546,"licensing":" class=\"mw-parser-output\"><\/div>"} 1描画プログラムの制限を理解します。ペイントは Photoshop ではないことを理解する必要があります。したがって、Photoshop で作成した絵をペイントで作成できるとは思わないでください。また、ペイントで保存されたファイルの品質は Photoshop よりも低いため、ペイント ファイルからの印刷品質が同じになることは期待できないことにも注意する必要があります。
- {"smallUrl":"https:\/\/www.wikihow.com\/images_en\/thumb\/9\/93\/Draw-and-Color-with-Microsoft-Paint-Step-17-Version-4.jpg\/v4-460px-Draw-and-Color-with-Microsoft-Paint-Step-17-Version-4.jpg","bigUrl":"https:\/\/www.wikihow.com\/images\/thumb\/9\/93\/Draw-and-Color-with-Microsoft-Paint-Step-17-Version-4.jpg\/v4-728px-Draw-and-Color-with-Microsoft-Paint-Step-17-Version-4.jpg","smallWidth":460,"smallHeight":345,"bigWidth":728,"bigHeight":546,"licensing":" class=\"mw-parser-output\"><\/div>"} 2変化をもたらすためにできることは何でもしてください。ペイントを使用して、写真などの既存の画像を変更できます。ペイントは Photoshop ではありませんが、次のような基本的な画像調整を行うことができます。
- 作物。ペイントを使用すると、他のプログラムよりも画像の切り抜きが簡単になります。画像の四隅をドラッグするだけです。
- 小さな問題を隠蔽する。絵を描くことができれば、その絵をコピーして貼り付け、絵に「パッチ」を適用して、絵の小さな欠陥を隠すことができます。
- 赤目を補正します。コピーする黒いピクセルがいくつかある場合、またはフリーハンド ツールの使用に慣れている場合は、ペイントを使用して赤目を修正するのは簡単です。
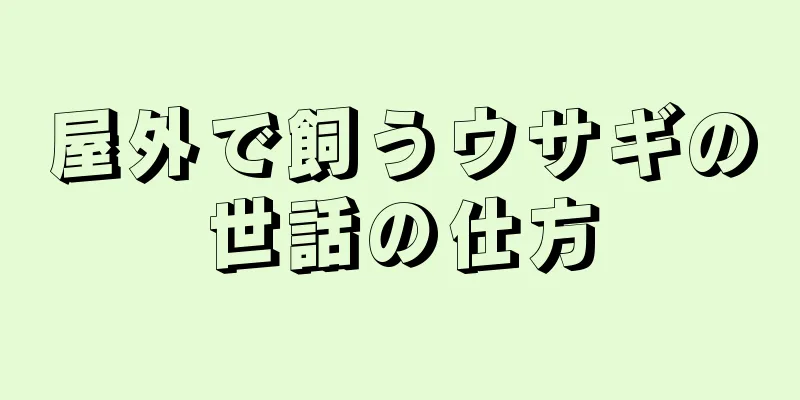
- {"smallUrl":"https:\/\/www.wikihow.com\/images_en\/thumb\/f\/f7\/Draw-and-Color-with-Microsoft-Paint-Step-18-Version-2.jpg\/v4-460px-Draw-and-Color-with-Microsoft-Paint-Step-18-Version-2.jpg","bigUrl":"https:\/\/www.wikihow.com\/images\/thumb\/f\/f7\/Draw-and-Color-with-Microsoft-Paint-Step-18-Version-2.jpg\/v4-728px-Draw-and-Color-with-Microsoft-Paint-Step-18-Version-2.jpg","smallWidth":460,"smallHeight":345,"bigWidth":728,"bigHeight":546,"licensing":" class=\"mw-parser-output\"><\/div>"} 3別のプログラムを使用します。もっと良いプログラムが見つからず、ペイントを使用しなければならないと感じたとしても、心配しないでください。選択肢はまだたくさんあります。電子アートを始めるには、次のプログラムを試してみてください。
- Oekakiというプログラムを使うことができます。このプログラムはペイントに似ていますが、より多くの機能があります。何もダウンロードする必要はありません。多くのウェブサイトではブラウザに Oekaki が組み込まれており、直接使用できます。 Photoshop のように、レイヤーを作成して、より良い作品を作成できます。
- もっと強力なものが欲しいけれど、Photoshop にお金をかけたくないという場合は、他の選択肢もあります。 Paint Tool Sai、Manga Studio、その他のPhotoshopに似たソフトウェアを購入して使用するには、100~200ドルを費やすだけで済みます。
広告する
ヒント- 単調な色(影なしなど)のアニメーションや描画は GIF 形式で保存でき、影付きの描画は PNG 形式で保存できます。写真は JPEG 形式で保存するのが最適です。 BMP 形式は画像の色が歪むため推奨されません。作業を保存するときは、この点に留意してください。
- 習得するまで、他のツールを試しながら練習を続けてください。
- 詳細を描画する必要がある場合は、ズームイン ツールとズームアウト ツールを使用できます。使用するには、「表示」を押して、画面の左上隅にある「ズーム」を選択します。
- 塗りつぶしツールを使用するときは、同じ色のパッチがすべて接続されていることを確認してください。境界線に塗りつぶしツールを使用すると、他の領域の色が変更されます。
- 練習すれば完璧になります!
広告する準備が必要です |